Monday, August 31, 2009

Get Connected: Facebook friends and fans only session discount!

This week on my studio's Facebook page, friends and fans are discussing: WHAT MAKES A GOOD PHOTO? Share your thoughts here and enter to win a $50 discount on your next photo session with Picture Your World Photography! I will use a random number generator to pick the winner based on how many people comment. Become a fan of Picture Your World Photography today!

An article in an All Things Photography newsletter got me to thinking again about something that's been on my mind: "what makes a good photo?" or even more specifically, "what makes a good photo in the eyes of a client?"

So many times I've been baffled by how subjective this really is. It amazes me how many times a client loves a photo I wouldn't have preferred. Of course, as a professional, I have learned how to view images from a compositional standpoint, evaluating it for symmetry, color balance and exposure and sharpness.

Most clients could care less about that stuff because that's what they've hired you to know! They just know that this image captured their high school's seniors first genuine smile during the photo shoot, or that that image is special because it captured a beloved neice they only get to see once or twice a year.

Instructor's Tip: Been There, Dune That

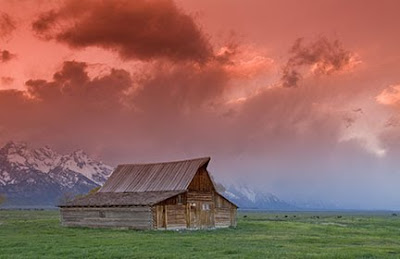
Photo by Russ Burden

I hope you enjoy this week's "Instructor's Tip" by one of my favorite instructors, award winning nature photographer Russ Burden. To learn more about how Russ captured the above image, join him on one of his photo tours. Visit Russ Burden Photography to get more information.

Been There Dune That
Sand dune photography requires care to keep your gear clean, stamina to make your way through soft sand, a flexible schedule to shoot at sunrise and sunset, and research to know what the dunes offer at the time of year you intend to shoot. Dune photography provides the photographer with opportunities to capture grand scenics, intimate abstractions of ripples and dune curves, wildlife potential, and macro possibilities of animal tracks, vegetation, and wind blown patterns. With the myriad of subjects you’ll encounter, you’re bound to walk away with some winners.

Sunrise and Sunset: The best times to shoot the dunes is within the first fifteen minutes of sunrise and the last fifteen minutes before sunset. With the sun at an optimum angle, you need to work quickly as the light on the dunes constantly changes so you need to get the shot and move on to another to maximize your time. Look for strong areas of shadows and highlights to give your images a three dimensional effect and to emphasize the patterns of the sand.

Walking: Walking through sand is much more difficult than on flat surfaces. As you begin to ascend a dune, you’ll find that for every forward step you take, you slide back a half. Make sure you’re in good shape and in the mindset to do some strenuous walking. Be prepared with snacks and lots of water as you’ll easily become dehydrated. You can pack light as most of your shooting will be done with a wide angle zoom.

Take a class with Russ or a fellow Digital Photo Academy instructor in your area, check out the Digital Photo Academy. I took Russ' intermediate and advanced courses last year, and he continues to be a strong source of knowledge and encouragement as I progress in my photography.

Saturday, August 29, 2009

Sneak Peak Saturdays


Picture Your World Photography Facebook page fans get a sneak peak of my latest photo sessions. Become a fan of the studio and get the first look at Leonardo's entire urban and edgy senior portrait shoot taken in the back alleyways of downtown Denver.

What I love most about this session was that I exceeded Leonardo's expectations. He confessed that he was worried sick that his big sister Alma had hired an older photographer who would shoot traditional portraits with no style. But by the end of the session, Leonardo said he was having a blast and that he was so happy to have found someone willing to try unconventional poses.

I finally got to try out some ideas, including shooting a senior riding on the 16th Street Mall shuttle and chowing down on his favorite snack: a double cheeseburger at Mickey D's. Leonardo, a shy social player at Alameda High School, said he felt like he was a celebrity by the end of the evening.

Wednesday, August 26, 2009

Get the Job Done: Testing out a new work flow


Jordan's senior yearbook picture before:


Jordan's senior yearbook picture after post processing:

In an effort to conserve my time and energy during the hectic senior session season, I'm trying out what I think will end up being a major workflow overhaul for my studio. It's still a work in progress, and I may end up adapting the workflow again as I find new ways to manage my time. But I'm going to give this a try for a while.

Currently, I'm running a senior special where I am only editing select photos chosen by the client, including the yearbook picture, two 8x10s, four 5x7s and one sheet of wallets. That's a big change from my old way of doing things. I used to spend days editing every single image from a session (which could mean several hundred). I'd present the client with all the images only to find out later
that they may have only loved 30 to 40 select images. It's inevitable that the clients never seem to like the images that I prefer and everyone you speak too prefers a different image! While I certainly believe a client is paying me for my vision, you just can't ignore the client's personal taste and the decisions they make based on those preferences.

Before, when I had fewer clients, I didn't sweat editing hundreds of images from a single session. I really do love post processing in Photoshop and it helped me gain experience! Clients never saw any of my unedited product until I was completely done post processing it. But since my client load has picked up, and the Rocky Mountain News has closed (meaning everyone still left working at the Denver Post is doing the work of at least two people), I realized that I just couldn't afford to keep editing like that.

So now, I'm trying out a proof method where clients choose a specified amount of photos they want retouched. I have been using the synchronize function in Adobe Camera Raw to auto correct all the files for global edits such as sharpening, noise reduction and exposure compensation. I won't do any blemish fixing, eye or teeth whitening, cropping, etc. unless the client choses that image for the extra work. I am ruthless about culling down the images to the very best because I just don't think it's a good idea to overwhelm a client with hundreds of images from a one- or two-hour session. I cut out duplicates, and if I immediately see that I want to change an image to black and white, I will do that to give the client an idea of what the finished product would look like.


BEFORE


AFTER

It takes less than 30 minutes to batch edit and export the files to a private online proofing gallery this way. The images are watermarked and resized automatically. Some photographers don't agree with this method because they don't want a client to see a less than perfected image. But I think your work flow may ultimately change based on your situation and what the client expects. I know that my senior portrait clients this season have been over-joyed to see their images a day after the shoot while the excitement over the session is still fresh. The process has especially worked great for several seniors who were on a tight turnaround schedule to get their photos into yearbook staffs in a matter of weeks.

Of course, the best way to make a workflow like this successful is to make sure you get as great an image in camera as possible instead of relying on "fixing it later" in post-processing. That may take a little more prep time in the front end, but it's worth it when you get compliments like this from clients:

"OMG, we had a hard time trying to decide what photos we wanted! They are all so good!! U did an awesome job!!" says Monique D., the mother of one of my seniors named Jordan. I had Jordan's final chosen pics edited in less than an hour!


BEFORE


AFTER

I'm also contemplating taking the workflow one step further by editing my favorite 15to 20 and only showing clients those images in a final format. If they're not satisfied, I would allow them to see all of the proofs to select others to edit. New marketing research has shown that reducing the range of options by offering only a limited selection of products keeps the client from getting paralyzed by too much choice, leading to lackluster sales. I don't want my clients to get so overwhelmed that they decide not to purchase anything at all.

What's your proofing and editing process method?

Tuesday, August 25, 2009

Breaking News: Call for Entry!

Kim Sporrer, one of my sources and the spokeswoman for the Humane Society of Boulder Valley asked me to get the word out about their first annual pet photography contest. Enter to win! And if you do, drop me a line and let me know! Good luck!
How fun would it be to see your pet featured in our publications that encourage other people to adopt more animals and learn more about humane education and training from the Humane Society of Boulder Valley? We’re looking for your best furry and feathered friends’ mug shots, so pull out your digital camera and start shooting photos. The Humane Society of Boulder Valley is announcing its first online photo contest.

We believe the relationship between a guardian and his/her pet is unique, so feel free to have people in your photos, too. If you include people in your shot, tell us how the photo demonstrates the special relationship between the person(s) and the pet, other family members or other animals.

All pet types are encouraged to enter, although we expect that dog and cat photos will be the bulk of our entries. Know that our judges will ensure the contest is fair and equal for all of our animal friends.

Photographs may be entered into one of the following five categories:

Best Baby Photograph
Best Glamour/Costume Photograph
Best Smile Photograph
Best Humane Society of Boulder Valley Alumni Photograph
Digitally Altered/Artistic Images
All entries must be submitted online by 3 p.m. MDT on September 1, 2009.

$15 donation per photo

To submit a photo or for more information visit this website.

Monday, August 24, 2009

Get Out There: Get your wedding photos published for free!


While thumbing through a recent edition of the "Brides.com/Colorado" magazine, I discovered a wonderful and FREE opportunity to help get some sorely needed advertising for my wedding photography.

"Brides.com Magazine" just started printing a local Brides magazine for the Colorado area called "Brides Colorado." Every issue, they have a special section called "Real Weddings," and "Real Engagements" that highlight local nuptials and engagement stories and feature images by Colorado wedding photographers. There are easily a dozen photos showcased in each two-page spread, highlighting lovely wedding locations and vendor information, including a list of wedding photographers. Real Wedding articles are also printed online offering more exposure, while there are 16 local editions in various cities throughout the country to help get the word out about your business.

Here's an example of a "Real Wedding" shot at the Denver Botanic Gardens by photographer Suzanne Wille, A Photo Opportunity

It's free to submit photos and details about the wedding and it's a great marketing opportunity for my company to get published in a magazine. I have asked all of my newly wed and soon to be wed couples if they would vouch for me, allowing me to share the details and photos about their wedding in hopes of having my photography featured in Brides.com.

The response was phenomenal:
"That would be great! We would love to help you in any way!! You are so great at what you do!!" says Jessaca, who's wedding I will be covering in Dec. 2009.

"Sure, I think that would be awesome. Just let me know anything we need to do," says Krista, who's wedding I will shooting next year.

Thank you ladies for your unwaivering faith in my abilities and I haven't even shot your special day yet!

Instructor's Tip: Flower Close Ups


I hope you enjoy this week's "Instructor's Tip" by one of my favorite instructors, award winning nature photographer Russ Burden. To learn more about how Russ captured the above image, join him on one of his photo tours. Visit Russ Burden Photography to get more information.

Flower Close Ups
Flower photography is very diverse. Whether it’s a sprawling field of orange poppies, a pattern in a field of tulips, a juxtaposition of a new bud with a freshly opened blossom, or a close up of stamens, each presents a series of challenges. The key challenge is to come up with something both technically and aesthetically fresh. Key factors that come into play enabling you to meet this challenge are proper use of depth of field, lighting, and composition. In this tip, I will zero in on how to deal with light when shooting flower close ups as each aspect is unique and reserved for its own write up.

Light: The biggest benefit of shooting flower close ups is a great image can be made any time of the day. Because you’ll be working with a small subject, you have the luxury of being able to shoot at noon and augment the light with flash, a diffuser, or reflector. The use of each of these tools will net a different effect of the same flower.

Diffuser: Bright overcast conditions are great for flower photography. The light is soft so detail is retained on the whites of the petals in addition to the shadows of the background. Even in bright overhead mid day sun, this quality can be mimicked using a diffuser. Commercial ones that are collapsible are portable and convenient to use and come in different sizes. They cleverly fold into a disc and are very light.

Reflector: Reflectors are used to bounce bright light back onto your subject to fill in the shadow areas. This softens the contrast as light is added to the dark portions of the flower. Doing so brings the highlights under control as the contrast range is lessened. Interesting effects can be had by combining a reflector and diffuser.

Flash: Flash can be used as a main or fill light. If your intent is to use it as the primary light source, you’ll need a fairly powerful one to provide enough power to override the sun. But I find a flash to be more useful as a source of fill to soften the contrast of mid day sun. Most good flashes allow you to control the amount of fill. This allows you to create varying contrast effects from just a hint of fill to completely canceling out the shadows.

Take a class with Russ or a fellow Digital Photo Academy instructor in your area, check out the Digital Photo Academy. I took Russ' intermediate and advanced courses last year, and he continues to be a strong source of knowledge and encouragement as I progress in my photography.

Don't forget to check Take Great Pictures for Russ' most recent tips. On the home page, click on the "Photo Tips And Techniques" button in the left hand column. Additionally, check out his "Digital Tip of the Month" found by clicking on the Digital Photography button.

Saturday, August 22, 2009

Saturday Morning Cartoons


Here is my favorite "What the Duck" comic from this week. Rock on Aaron! "What the Duck" is an online comic strip created by Aaron Johnson. Viewers are welcome to link, post, copy/paste, or save the strips to their own sites, blogs, forums, newsletters, etc. Aaron also allows viewers to suggest titles for his individual strips, which I think is a great way to interact with his blog readers.

This Weekend: Where my girls at?

Alyssa: Graffiti Falls
Today I will be signing two contracts (one for a senior portrait session and another for family portraits) and will finish the evening shooting another senior session in downtown Denver. I'm totally psyched about that, but I just have one question....

Where my girls at????

Alyssa: Graffiti Fals

Last year, all the senior portrait sessions I shot were of females. This year, it's raining young men! It never ceases to amaze me how things work out. I've been bemoaning the fact all year that I needed more experience learning how to pose men, and I'm definitely getting those opportunities now. But I miss hanging with the girls!

Alyssa: Graffiti Falls

The studio has had a tremendous amount of success with its latest promotion: a one hour senior photo session at anyone location for just $150. The price includes two 8x10s, four 5x7, a sheet of wallets and of course that yearbook shot that stands out above all others. With many senior photos due by Oct. 1, this discounted session understands that while time is of the essence, clients still want a fun and exciting session that captures a senior's individuality. Sessions for September are filling up fast. Contact the studio today!

Alyssa: Graffiti Falls

Tuesday, August 18, 2009

Get Connected: Free webinar with photography mentor


Log on to the Mentor Series Worldwide Photo Treks Forums for a free live discussion with PopPhot.com Workshops mentor Steve Simon today at 4 p.m. EST.

Simon has been passionate about documenting life through photography since he began taking photographs at age 12 in his home city of Montreal. He graduated from Concordia University in Montreal with a degree in Communications/Journalism. He is based in New York City, but is frequently in Montreal and Toronto.

Monday, August 17, 2009

Instructor's Tip: Capturing Waterfalls

Photo by Russ Burden
I hope you enjoy this week's "Instructor's Tip" by one of my favorite instructors, award winning nature photographer Russ Burden. To learn more about how Russ captured the above image, join him on one of his photo tours. Visit Russ Burden Photography to get more information.

Capturing Waterfalls
Capturing great waterfall shots is not a difficult task. Keys to getting them are knowing what time of year to be there to get the best water flow, what time of day to photograph them, and deciding what shutter speed to use to either freeze the motion of the water or exaggerate its movement. Otherwise the same basic rules of good photography apply with regards to composition, handling the background, light, etc. Depending on the amount of spray it emits, you will need to bring an absorbent cloth to continuously wipe off your filter. This is especially true if you work close to the falling water. If you do, be especially careful of your footing as the mossy ground can be very slippery.

Although great waterfall shots can be made with a point and shoot, an SLR will benefit you tremendously as you can control the shutter speed dictating the look of the water. A slow shutter speed allows you to create a cotton candy effect giving the appearance of falling white lace rather than water. A fast shutter speed freezes the drops. The cotton candy effect conveys a tranquil feel while the frozen drop effect exudes power and strength. It’s a matter of personal taste as to which look you prefer although you’ll often find that the amount of light on the falls dictates the shutter speed. If there’s too much, you can add a neutral density filter to slow it down, but if there’s not enough and the goal is to shoot frozen drops, you’ll need to return when the light is more intense.

Other than an SLR, there are a few key pieces of equipment you’ll need to get good waterfall shots. A zoom lens will give lots of versatility with regards to composition. A tripod is a must to steady the camera when making long exposures. A polarizer is highly recommended as it will remove the glare from water covered rocks surrounding the falls. As you rotate it, you’ll be able to see the effect through the lens. The only drawback is the polarizer will eat up 1 1/2 stops of shutter speed so if the frozen drop effect is your goal, you may have to forego its use.

Take a class with Russ or a fellow Digital Photo Academy instructor in your area, check out the Digital Photo Academy. I took Russ' intermediate and advanced courses last year, and he continues to be a strong source of knowledge and encouragement as I progress in my photography.

Don't forget to check Take Great Pictures for Russ' most recent tips. On the home page, click on the "Photo Tips And Techniques" button in the left hand column. Additionally, check out his "Digital Tip of the Month" found by clicking on the Digital Photography button.


Saturday, August 15, 2009

This Weekend: Engagement Workshop and Senior Portrait Session

Starting this morning, I will be hosting an engagement/bridal workshop! About four couples and two former brides' whose weddings I shot will be modeling for me and about a dozen of my photography colleagues from the Mile High DPS Social Group and in the Mile High Photographers organization. You may remember the site as the secret garden inside the DU campus where I and my assistants took formal portraits of my last wedding couple, Peter and Harriet seen here:
Image courtesy of Paul Martin for Picture Your World Photography

I got this idea a few months ago to invite the brides I have shot to model their fabulous dresses so I could experiment with some illustrative, magazine style bridal portraits in a lush setting. All of the portraits of brides I've shot in the past have been during stressful times, usually sometime after the bride shimmies into her dress right before the ceremony. I had one session with a bride where I shot her in studio, but this will be the first time I get to relax and try out some lighting arrangements I've been researching without the pressure of wedding coverage weighing me down.

Taken by me while driving in the limo to the wedding

When a colleague told me he had a couple who needed engagement shots as well, we came up with the idea of having several more couples come to get shot as well, turning the shoot into a morning workshop. At first I was worried that we would have more models than photographers. But now we have plenty of shooters who need these kinds of shots for their port. Each bride or couple will be divided among a group of 2-3 photogs who will work with them for about 30 minutes, then we will switch so that each photographer has a chance to shoot all of the models. Afterwards, each photographer has pledged to give three free, unwatermarked images to the models, trading their time for prints. I will have the photogs email me the images and upload them to a private gallery on my website where the models can download originals from there.


Then, later that afternoon, I will be shooting a senior portrait session in downtown Denver. Jordan, 17, and his mother Monique, are one of the first people book a special discounted senior session I started advertising this week. The promotion includes a quick hour-long session with two 8x10s, four 5x7s, a strip of wallets and of course the yearbook image for just $150.

Jordan is an adventurous teen and he will be the first I've photographed with a prop -- his violin! He wants his shots to be urban, edgy and fun with interesting tilts and angled shots. He's definitely interested in doing some modeling, so the photos he chooses from this session could also be the start of his very own modeling portfolio.

Friday, August 14, 2009

Get the Goods: Resolution -- All About the Pixels

I wanted to shared this great iStockphoto Tip of the Month with my readers today. I'm always having trouble trying to figure out the correct resolution formula for various photo print sizes. So I was excited to get this information sent to my email:


Required resolution varies depending on use, but in general, for web & online use, you don’t have to worry about the dpi: just look at the number of pixels. For print you'll need a larger-sized file with a higher resolution. Check with your printer, but large presses usually require an image at 300 dpi. If outputting on a large format inkjet printer, the minimum resolution is probably about 100 dpi, but (with diminishing returns), a higher resolution will produce better results. An average home or office inkjet printer can usually produce fine output with 150 dpi, but higher resolutions produce better results. Your best option is to do a few test prints and see where you can perceive the difference.

The two most important measurements you need to be aware of to ensure your image will be big enough for your use are size and resolution. Yes, especially in this case, size matters. Both can be manipulated in Adobe® Photoshop® under Image, then click Image Size.

The magic resolution formula

To find out if your image is large enough for your end use without pixelating the image, divide the number of pixels by the resolution. For example:


This means the printed piece can be a max of 10” before some loss of image quality. If your printer only required 150 dpi, you could print the image as large as 20”.
What size image do I need for web or print?

What size image do I need for web or print?


If you are still confused then read this great article and hopefully it will help.

Wednesday, August 12, 2009

Get Out There: Senior Portrait Promotion!


Don't freak out if you haven't gotten your senior portrait taken yet for the upcoming school year! Picture Your World Photography has got you covered with a brand new, discounted 1-hour session for seniors still facing a deadline to get their mugs turned into the yearbook staff.


From now until Jan. 1, 2010, pay just $150 for a senior portrait shoot either in studio or on location and receive two 8x10s, four 5x7s, a sheet of eight wallets and of course that all important yearbook shot. Check out highlights from previous senior portrait sessions by viewing this gallery.


If that's not enough for the teen overwhelmed with incessant requests for pics from family and friends, then consider upgradinging your package to a CD that includes all images from your session. A disc with images sized to print up to 4x6s will run you an additional $100 while a DVD filled with high resolution images to print to poster sizes as large and in charge as you want to be is an extra $200.

Every student will receive a private, password protected gallery and url to give to friends and family for checking out your photos and purchasing more. Plus, take advantage of the studio's Referral Program by telling friends to book a session with us. Everyone time someone does, you get $25 off your next session or $25 worth of free photos from your current session.

Tuesday, August 11, 2009

Get the Job Done: Sunday's car show most successful yet!

Photo by Jason Peckovitch

Sunday's "Hot August Nights" car show in Fort Collins was by far the most successful one yet for myself and partner Jason Peckovitch of Illusive Dreams photography. Our photo booth was one of the most popular at this inaugural event, and I certainly hope Jason and I can be apart of it for years to come.


Jason was able to secure three lovely ladies to be our models for the day. Their presence at the show was undeniable. They spent the first hour or so walking the show talking to car owners and asking them if they would like a photo of one of the models showcased near their vehicles. Having that one-to-one contact with the models got the ball rolling for us, but our exposure skyrocketed even more when the ladies participated in a bikini contest at the show. One of them even won a portion of the first place prize money! Plus, having printed and framed examples of shots Jason took at the last show available helped give people an idea of what to expect, as well as offered another potential revenue stream because several people wanted to make offers to purchase those framed images too.


Before long, we were overwhelmed with people coming up to the booth asking if they could get a shot with Steph, Mandy or Chastity. We had orders from 20 people with everyone spending on average $15 to $20. That's a heck of a lot more than the six orders we had at the last car show! I was editing right up until folks started taking their tents down. One of the keys to our success was Jason's ability to take extremely clean images from the get-go. That meant all I had to do was bump up the clarity and vibrance in Camera Raw, do some sharpening and quick curve adjustments, save and print. Plus, Jason always shot at least three different poses for each car and model combo, making it difficult for clients to just pick one image to print. It was far easier to say, "I'll just take one of each," which quickly boosted our sales.


If it weren't for one of the model's boyfriend's helping us take orders while I did the editing, we may not have made it! As a matter of fact, we may need to get assistance from another shooter too. Of course being at a car show makes it easier to find out about others that are happening around the metro area, so we are busy trying to fill up our schedules with more events to come. I was sitting and editing and staring at my laptop for so long that my eyes and my butt ached. But these photo booths are a ton of fun and I love being able to interact with our clients, shaking hands and handing out cards.

Monday, August 10, 2009

Instructor's Tip: Change the Cliche

I hope you enjoy this week's "Instructor's Tip" by one of my favorite instructors, award winning nature photographer Russ Burden. To learn more about how Russ captured the above image, join him on one of his photo tours. Visit Russ Burden Photography to get more information.

Change the Cliché
As a leader of photo tours to many of the classic natural destinations in the United States, I need to bring my participants to the photographic icons of each location. These locations have been shot tens of thousands of times yet we gravitate toward them because of their beauty. They are the post card shots we all want. As we stand elbow to elbow with many other photographers, I often wonder what we’re trying to accomplish unless something new or different is tried. But every time I go to one of these places, everyone is using the same focal length as the postcard and framing it the same way. I encourage you to try something different.


Look for Intriguing Light: I’ve been quoted as saying, “I’d rather shoot a mundane subject in great light than a great subject in dull light.” A shot of a grizzly bear in flat gray light nets a boring image but a simple rock formation on the prairie with storm clouds and a rainbow nets a winner. In essence, it’s all about the light. You know it all comes together when you’re at one of the iconic locations and the light is working for you.


Short List of Ideas: To make your images different from all the other iconic ones, try the following: look for the great light, experiment with the time of day, try a different focal length from the post card shot, shoot from a different angle, make a double exposure, zoom the lens while making the exposure, isolate a section of the whole, make it black and white, or try a combination of any of the above.

Take a class with Russ or a fellow Digital Photo Academy instructor in your area, check out the Digital Photo Academy. I took Russ' intermediate and advanced courses last year, and he continues to be a strong source of knowledge and encouragement as I progress in my photography.

Don't forget to check Take Great Pictures for Russ' most recent tips. On the home page, click on the "Photo Tips And Techniques" button in the left hand column. Additionally, check out his "Digital Tip of the Month" found by clicking on the Digital Photography button.

Saturday, August 8, 2009

Saturday Morning Cartoons


Here is my favorite "What the Duck" comic from this week. Rock on Aaron! "What the Duck" is an online comic strip created by Aaron Johnson. Viewers are welcome to link, post, copy/paste, or save the strips to their own sites, blogs, forums, newsletters, etc. Aaron also allows viewers to suggest titles for his individual strips, which I think is a great way to interact with his blog readers.

This Weekend: Booked a senior session, hosting another photo booth

ON SATURDAY:

Today, I booked my first senior portrait of the season! I met my client, Monique, last year when I took senior portraits for her friend Christine's daughter. Monique attended the session and hung out with Christine while I shot her daughter. Monique enjoyed the photo shoot and loved the photos so much that choose me to shoot her son's session. That's one of the best referrals you can ask for, and because of it, Christine's daughter will receive $25 worth of free prints!

I am extremely excited about this session because it will be the first one I've shot with a senior male and a prop. Jordan, 17, plays the violin and he wants several shots with his instrument in them. Jordan said he wanted his photos to be edgy, urban and abstract. We decided to start shooting along the 16th Street Mall in Denver, and specifically near a sculptural garden that captured Jordan's eye.

Here are some examples of the kind of poses he's looking for:


ON SUNDAY

On Sunday, Jason Peckovitch and I will set up our photo booth and sell prints at the first annual "Hot August Nights Car Show" in Fort Collins. We met the client who hired us to shoot this event at our last car show coverage where we discovered that beautiful models and fast cars meant lots of print sales. If these events keep being profitable for us, I think Jason and I should start coordinating our schedules so we can be prepared to have booths available at various events throughout the car show season next year!

Thursday, August 6, 2009

Get the Job Done: Shooting opening night of a film festival


This evening, I will be shooting the opening ceremonies for the First Annual DocuWest Film Festival hosted by the Foothills Art Center in Golden. The event organizer asked Efrain Cruz, director of Illuminate Workshops, to provide student photographers to cover two days of festival. I told Efrain I would be able to work tonight's shift, photographing the reception, first moving screening and after party from about 6 till 10. As part of my compensation for the work, I get free access to film festival which as an interesting line-up of featured works.

I've never attended a festival like this, so I can't wait to see tonight's film "Kimjongilia." Accepted into the 2009 Sundance Film Festival, Kimjongilia reveals the shocking truth about North Korean forced labor camps as survivors talk about the horrors the experienced.

The event organize has asked for primarily posed shots as well as a few candids to show people enjoying themselves, both of which I'm very good at. Tonight's event should offer me more foundation building experience of shooting indoors in low lit areas. Plus, I am looking forward to meeting new artistic contacts in Golden, a city I haven't spent much time in, and gaining exposure for possible future clients. I'm glad to know that Efrain's referral network is working, providing opportunities for his students to be successful in their craft.

Wednesday, August 5, 2009

Growing Pains: Resolving payment issues for clients


Panic made my client's voice shake when he spoke into the telephone receiver. Immediately, my heart and stomach sank as I contemplated all the myriad of reasons why he and his wife-to-be must have changed their minds about letting me shoot their wedding in December.

"I tried to make a full payment for the wedding coverage using the PayPal shopping cart buttons on your website, but PayPal took it out of my checking account instead of my credit card! Can you get them to stop the payment?"

Having made that mistake before during my own purchasing process, I knew firsthand the anxiety my client was feeling. Of course you want to be able to do anything to please a client, especially ones who offer to give you a full payment, upfront, months before an event takes place this most wedding client did. Thank goodness PayPal allows its users to refund payments back to a buyer (as well as fees). My client was able to make the payment again from the correct account, and within minutes, we both received emails describing all of the transactions, including the refund and my client's final payment.

PayPal's resolution center also makes it easy to respond to buyer disputes. Here are tips to help your payment transactions go smoothly:

1. Overall precautions:

Provide clear, detailed descriptions. Buyers don't like surprises. Give a detailed description of your item and include photos. Pictures are especially important when selling in countries where buyers may not be as fluent with the language in which the seller wrote the listing. Also clearly state your return policy in a place where buyers can find it.

Respond promptly to inquiries. Show buyers that you are listening by promptly and courteously responding to all questions.

2. Before accepting payment:

Beware of unusual requests. Abnormal requests can be a sign of suspicious activity. A few examples include:
Rush shipments at any cost.
Partial payments from multiple PayPal accounts.
Payments not received in full.

Be extra cautious with high-priced items. It’s fairly common for shipping addresses to differ from billing addresses. However, be extra cautious when sending high-priced items, especially if payment is received from one country and sent to another.

Know the buyer.
Do they have a confirmed address?
For e-commerce sites with feedback systems, what is the buyer's score?
Do you have any questions? Get answers by emailing or calling the buyer.

3. Shipping tips:

Track packages. Packages should be sent with tracking numbers. Once you get a tracking number from the shipping service, promptly send it to the buyer. As an extra precaution, you should consider adding delivery confirmation. Finally, make sure to keep proof that the package was received by the buyer.

Insure packages. When sending goods, opt for postal insurance to protect yourself in the event that a shipment is lost or the buyer claims it was never delivered.

Keep buyers up-to-date about delivery. Set expectations up front. Once payment is received, give buyers an estimated delivery time. Keep in mind, it's better to overestimate delivery time than have a package show up late. If a package is not sent in time, tell your buyer about it.

Monday, August 3, 2009

Instructor's Tip: Textures


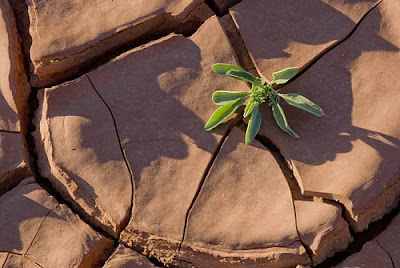
I hope you enjoy this week's "Instructor's Tip" by one of my favorite instructors, award winning nature photographer Russ Burden. To learn more about how Russ captured the above image, join him on one of his photo tours. Visit Russ Burden Photography to get more information.


Textures come in all shapes and sizes. From a close up of a moth’s wing to an array of balconies of a high rise hotel, they can be found almost anywhere. They can be soft like the feathers of a bird, fragile as peeling paint, delicate as ripples of sand, patterned like a plowed farm field, etc. The key in revealing them is the direction and hardness of the light. With regards to direction, the more it comes from the side, the more the texture is revealed. With regards to hardness, the more direct and pinpoint it is, more texture is revealed.

When photographing large scenes or grand landscapes that contain textural elements, the classic time of day at which they should be photographed is within the forty five minute period just after sunrise and just before sunset. Additionally, in order to take advantage of the low angle of the sun, your subject must be close to a ninety degree angle from where the sun rises or sets. When these conditions are met, the light strikes the subject from the side revealing a world of highlights and shadows. This is what causes textures to pop. But even with the golden light of sunrise or sunset, if the subject is front lit, subjects look flat as no texture is depicted. Look 90 degrees to your left or right and a world of texture opens before your eyes.

Take a class with Russ or a fellow Digital Photo Academy instructor in your area, check out the Digital Photo Academy. I took Russ' intermediate and advanced courses last year, and he continues to be a strong source of knowledge and encouragement as I progress in my photography.

Don't forget to check Take Great Pictures for Russ' most recent tips. On the home page, click on the "Photo Tips And Techniques" button in the left hand column. Additionally, check out his "Digital Tip of the Month" found by clicking on the Digital Photography button.

Sunday, August 2, 2009

Growing Pains: More Exposure for Picture Your World!


I have been asked to display several of my photos at the Wolf Camera store in downtown Denver! A store manager there, Jessica Olesky, photographer and co-owner of Impact Images, contacted me last week and asked if I would be willing to participate in her venture to highlight the work of several photographers' whose work she knew and respected. It's a wonderful, gracious offer and I want to thank Jessica for her faith in my abilities as well as her willingness to open up a platform for other budding photographers to showcase their creativity.


Jessica said "Terri's Rose" was a given for the display. I was worried that the 20x30 I had framed would be too large. But she placed it large and in charge, in the direct front and center of the setup! I also decided to hang up this nighttime image of the South Platte and this fiesty fox that visited the backyard of a friend's wood cabin in Jefferson County.


The gallery set up at the camera store is impressive, and each image is available for sale. Before, I used to get stymied by trying to price my work until I remembered how expensive it was just to by the frame and mats, much less the print itself. Plus, I think what's even more important is the power of exposure. Even if no one buys one of my prints, having my name and work out there will hopefully keep me forefront in potential customers minds for future services if they like what they see.


If there is anything I've learned this month, it's that no matter what size your studio is, creating visibility is the only way to increase sales. Exposure can mold a company brand and drive how potential customers view your product or services. I've been greatly blessed with many opportunities to have potential customers see my product and services with an ongoing display at a local deli, Facebook ads, internet presence and most recently by hosting several photo booths -- all of which have helped me expand my reach and lure in new clients or print sales.


Best Posts

Picture Your World Photography is a premiere photographer in the Denver, Colorado Photographer community on MarketingTool.com.